Hi friends! I’m back again with my sporadic posting. It’s busy in these parts and I just don’t have the time that I used to, but I’m still slowing chugging away on projects.
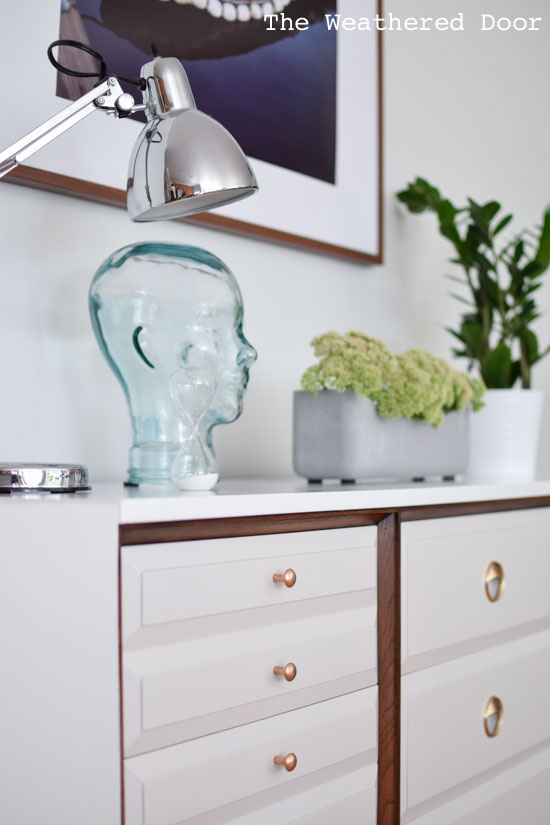
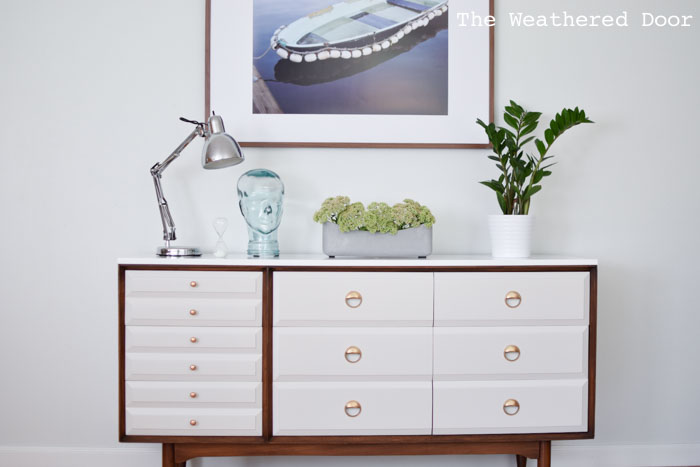
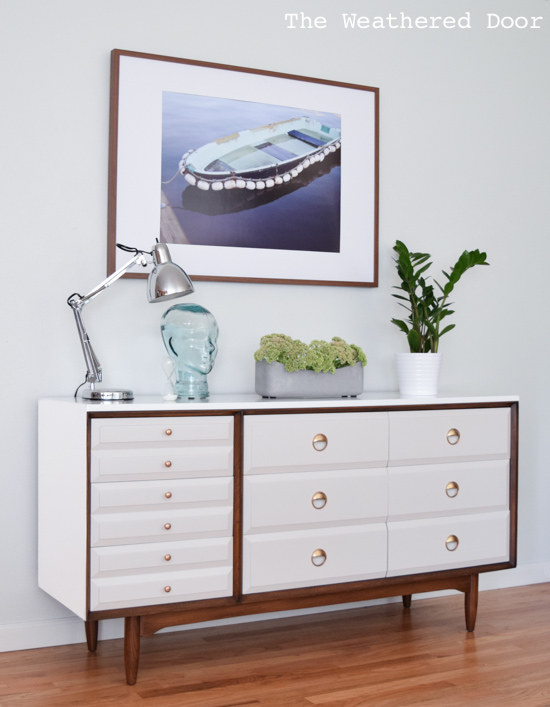
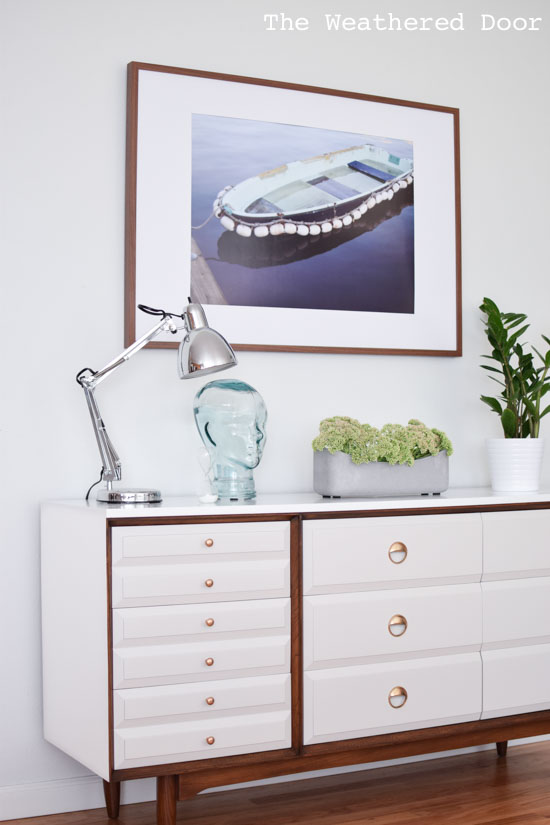
Today I have a mid century dresser makeover to share. I picked up a little set that included a credenza size dresser and two nightstands. I have not even started doing a single thing with the nightstands but have some ideas for them. In total I spent $40 for all 3 pieces which is a screaming deal! Here’s a little run down of what went in to making over this modern piece.
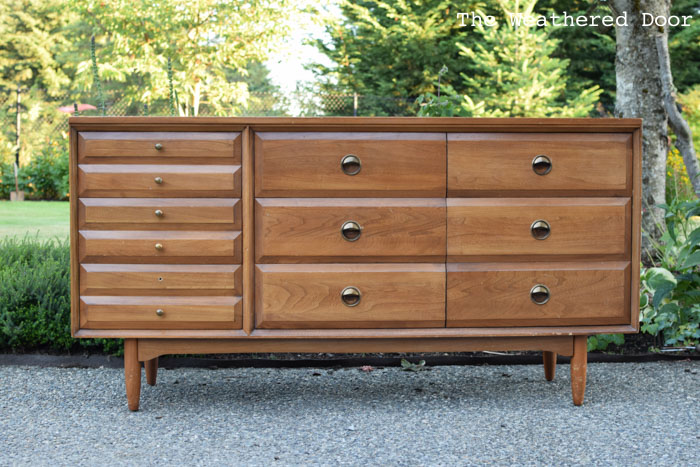
The first thing that needed to be done was stripping. I knew I wanted to accent some of the details in a walnut color stain. For me I chose the legs/base and the beveled dividers surrounding the drawers. The top was also pretty beat up. The lacquer topcoat was coming off in areas and it was so thick that sanding through it just wasn’t going to work. Since I was stripping the top I also stripped the sides as well. The reason being once that lacquer was taken off the wood grain was going to come through, and if it was going to show on the top, I wanted it to be consistent and show on the sides.
I went ahead and stripped everything but the drawers. I have a video tutorial about stripping wood furniture. If you want details on my process check out this post as well. It took 2 rounds of stripping, scraping and washing to get most of the finish off, then once it dried I spend a couple of hours sanding everything out. I had to hand sand the legs and the beveled wood accents surrounding the drawers. My hand were cramping up after that! To fill the dings (especially the larger ones) I used Bondo. This product is great because you mix a hardener cream into it which means it actually hardens well. Most wood fillers do not dry hard enough to be able to fill larger problem areas and do not sand well. This does.
For stain I mixed General Finishes gel stain in the colors Java Gel and Antique walnut. I would guess it’s about a 50/50 mix of the two. I applied the stain and wiped off the excess before letting it cure for 48 hours. Once it had dried I sealed it will 2 coats of General Finishes high performance topcoat in Satin. After I brushed on the first coat of poly I used a fine grit synthetic steel wool to smooth everything out, then applied the second coat of poly.
Next was painting the frame. I taped off the wood accents I had just stained and sealed (once they had dried) and use my handy dandy little tip to get no bleed through. I rolled on 2 coats of Kilz oil-based stain blocking primer. Once it dried I used high grit sandpaper and sanding sponges to smooth everything out really well. Next I moved the piece (minus the drawers and legs which were removed for the spraying process) into my spray booth and used Benjamin Moore’s Advance high gloss paint in white. I’ve used this paint before on the high gloss credenza with geometric drawers and it turned out really well. I didn’t have the best luck with a darker color of the Advance paint, but the white BM Advance sprays well and cures well for me. You can read about my experience and review of Advance here. I only needed to spray on 2 coats of the Advance paint. I waited a few days in between coats, but it only require 16 hours (I know, only! haha).
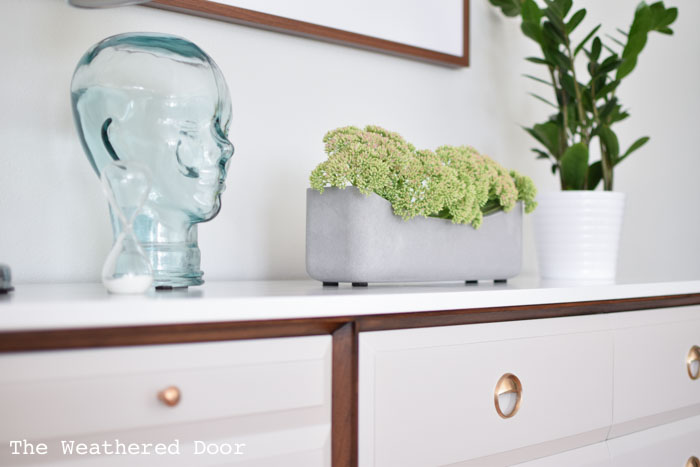
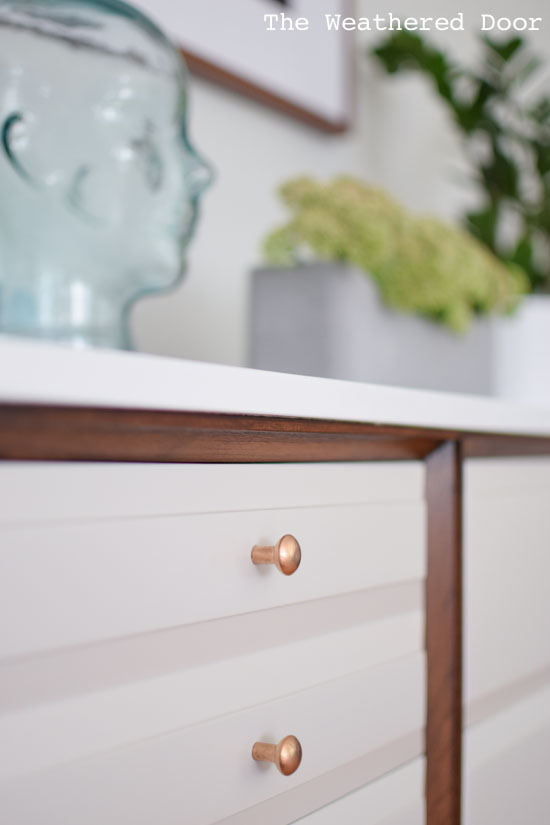
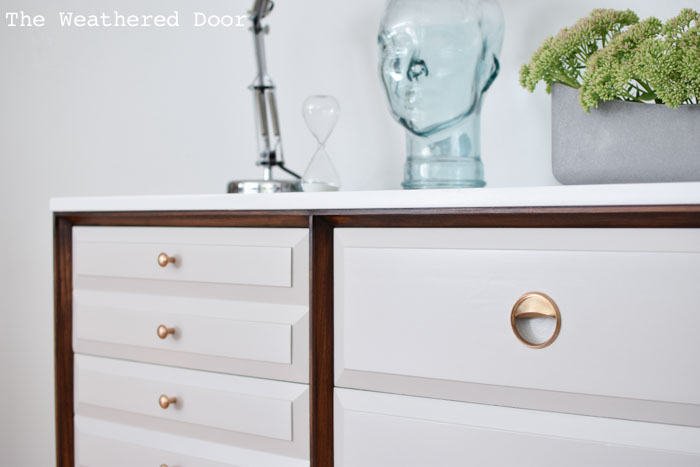
The drawers were not super pretty as-is and were made of a grain-y oak wood just like the rest of the piece. I chose to paint them in a light, warm gray tone. You can also call the color greige, or taupe. I first had to sand and fill in as many dings and scratches as I could using Bondo glazing putty. The best price I’ve found is Amazon, but I have also purchased this product from Sherwin Williams. I’ve been using it for a year now and it works amazing as a wood filler. It sands well and adheres well, the only thing is it is an oil-based product and definitely has an odor. For larger, deeper dings I used this Bondo. The drawers were primed with spray cans of Zinsser cover stain in white. I made sure to cover them well with the primer, then sanded them smooth. The paint color is Sherwin Williams Popular Gray. I used their Pro Classic in Satin and brush on 3 coats. I sanded in between each coat to smooth everything out, then used my HVLP husky spray gun to spray on General Finishes high performance topcoat in Satin to seal the paint.
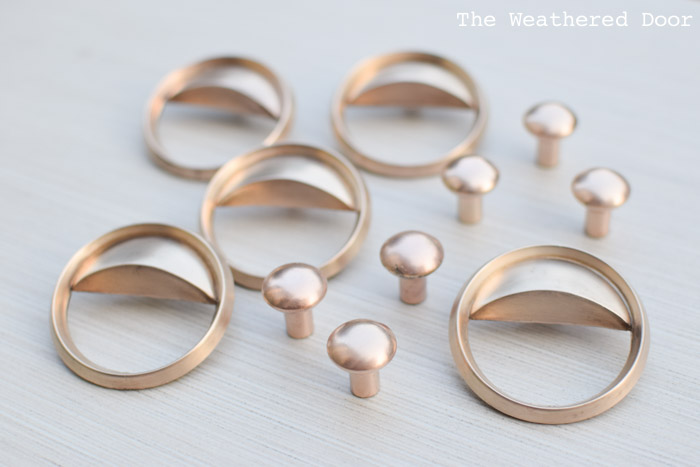
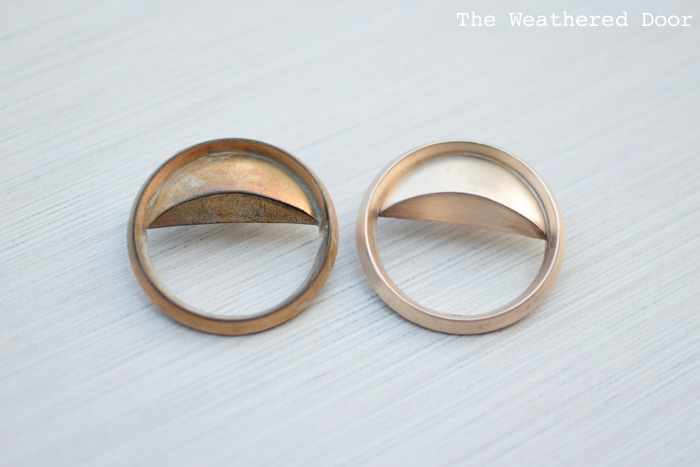
The last thing I had to do was shine up the hardware. The process is shown in the video above and also in this how to post. I love the hardware on this dresser but it needed some help. It had scratches and was tarnished and worn to a fake gold-looking color. I first stripped off the old finish with Citristrip. I just put the knobs and pulls in a small container, added some Citristrip and used a brush to make sure every surface was covered. I waited about 20 minutes, rinsed them off and them used Bar Keeper’s Friend and a scrubby sponge to shine up the brass. It made such a difference!
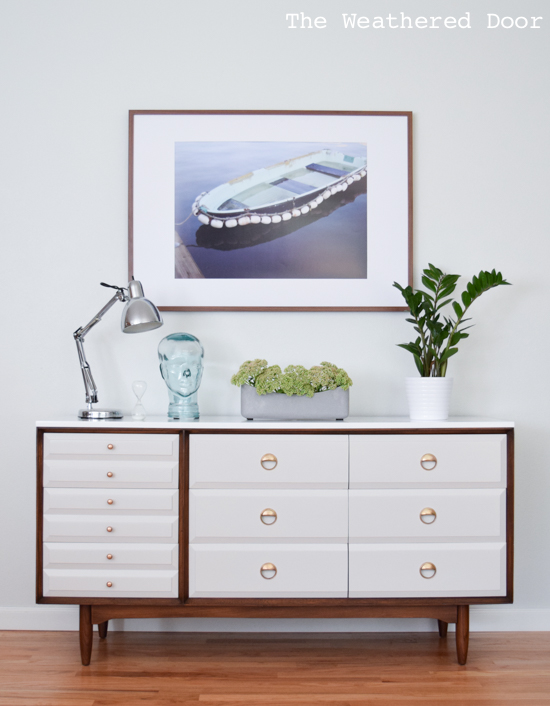
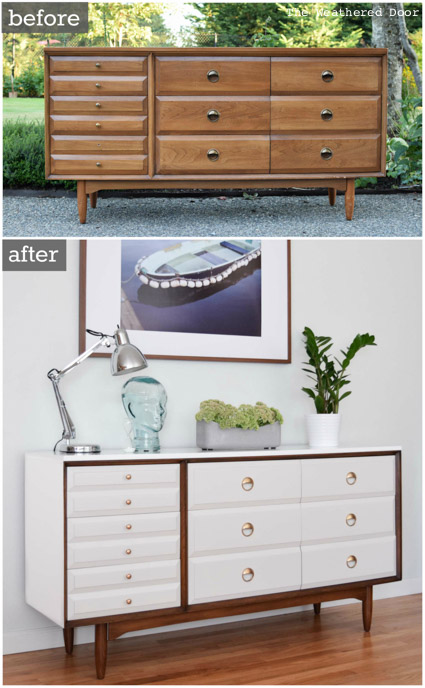
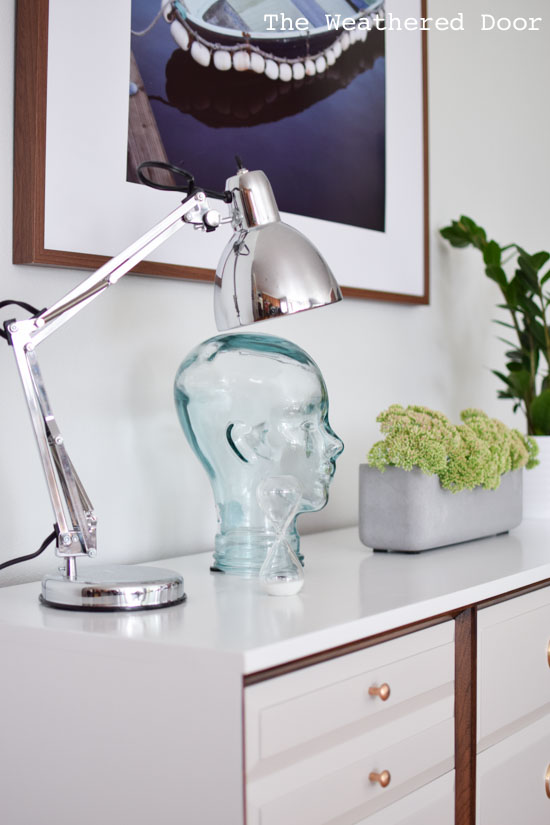
Beautiful piece now!
Wow! Im partial to the before, but it looks great either way. I am BLOWN away by the hardware! I've never seen using citristrip before the bar keepers anywhere! (And im on pinterest more than I should admit) I cant wait to try it out myself!
Bar Keeper’s friend is a life saver when it comes to reviving old hardware, especially brass!
It looks beautiful. Great job! And thanks for that hardware tip too – I had no idea! Great info here and the piece looks wonderful.
gorgeous piece, and i like the way you styled it, too.
b
Wow, a complete transformation!! I’m drooling over the natural wood and paint combo. Really, it turned out so pretty! And I seriously cannot believe the difference in the before and after of the hardware…I can’t tell you how many of those discolored hardware pieces I have thrown away thinking how ugly they were. Now I know how to save them! Thanks for sharing.
Shonee
http://www.hawthornenandmain.com
Thanks, Shonee! I dread polishing hardware sometimes, but it can make such a difference!
You are an answer to a prayer! I also have a mid-century credenza. I wanted the piece painted and also stained. That was all I could decide! The piece sat for weeks staring at me. I couldn’t decide whether I wanted more wood or more paint on the piece. Browsing your website I came across 2 credenzas. One with the drawers left stained and the frame painted and visa versa. IMO, mid-century credenza’s look similar, so now I had an example of each way! I decided to go ahead and paint the frame and stain the rest with confidence that I would love the piece. So thank you. I know design bloggers, not only put in the work to upcycle their pieces but showing quality photos of your finished piece is just as important!! You are a brilliant designer! Keep up the good work!
Thanks, Shawnee! Glad to hear those pictures and posts helped you with your own project 🙂