A while back I got an awesome mid century dresser with a laminate top for a screaming deal at goodwill. I feel like there’s this negative connotation when it comes to pieces of furniture that have laminate tops. For a lot of people, it’s a reason to not buy or attempt to refinish and paint a piece. Well I’m here to tell you otherwise. I actually think it can be a good thing in some cases (Here’s the dresser I’m referring to, it only has laminate on the very top)
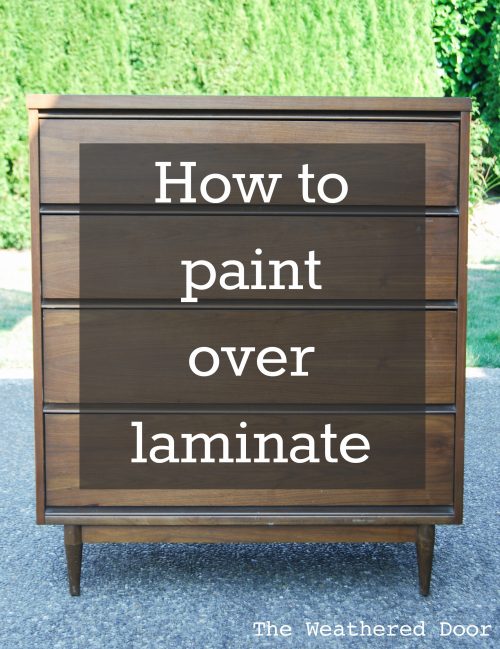
The reasons I embrace a piece that has a laminate top is because:
1. It can be painted over
2. It usually means the top is in good condition
Let me explain a little more. First, laminate can be painted over. It’s not difficult (at all), you just need to do it right. I’ll go into the how to paint laminate in a minute. Second, laminate is more durable than wood when it comes to scratches and dings. Most likely a piece with a laminate top will be in better condition. The tops of furniture get a lot of wear. Things are set on them, slid across them, and even dropped on them. That leads to little dings, scratches, gouges and often chipped veneer. On certain pieces that is fine, but other times if you want a clean and modern satin or glossy finish, those flaws will be highlighted when light bounces off of them.
More often then not I see laminate used on mid century pieces. When I paint mid century pieces I go for a modern, clean look without distressing. Because of that I’m not looking to highlight or embrace the flaws that can add character to antique furniture, so I happily welcome a piece with laminate while still making sure it’s well made and high quality.
Here are some pieces I have painted that had laminate tops:
Glossy Black Campaign Chest
Orange Geometric Nightstand
Persian Blue Nightstands
Watch Here
How to paint over laminate
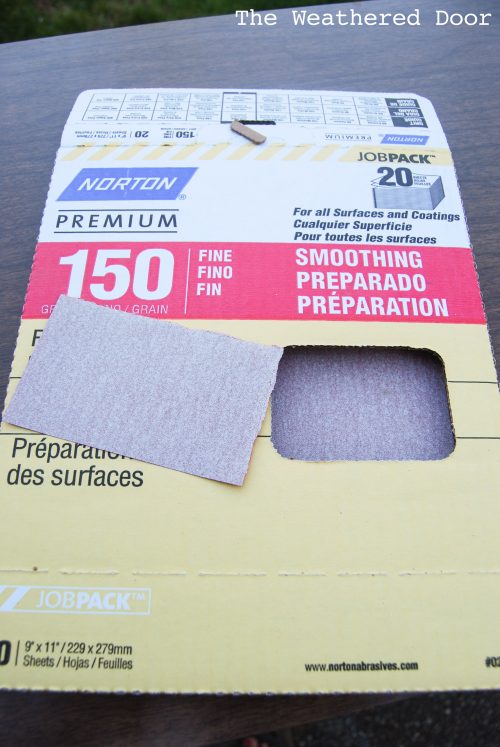
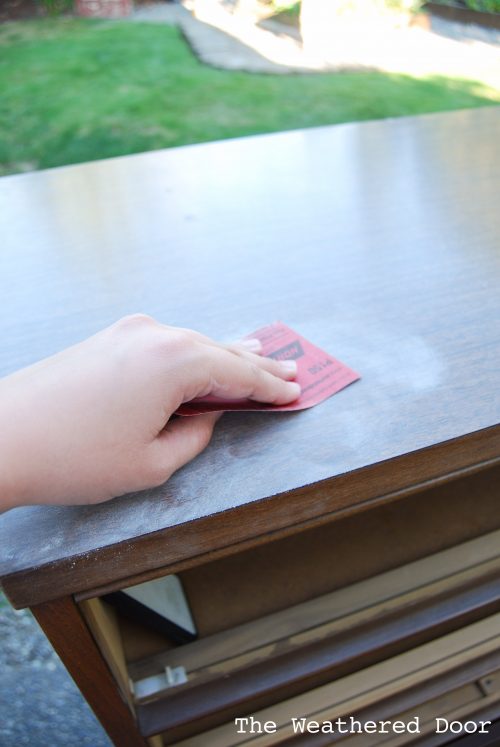
1. Begin by sanding the laminate. Be sure to use the correct protective gear (a mask and safety glasses). I personally take a 150 grit piece of sandpaper and sand the whole top in a circular motion. You can also take an electric sander to the piece. Once it has all been sanded you should be able to see that it’s scuffed up and not as shiny and smooth as it was before.
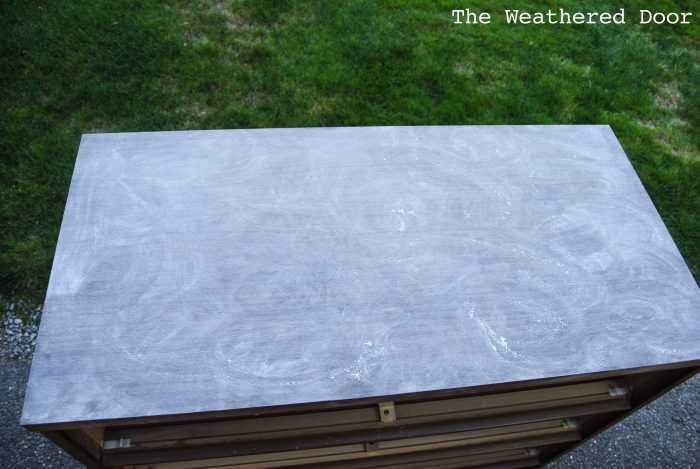
2. Clean the surface. Get most of the dust off with a vacuum and then a damp paper towel or cloth. I recently started wiping piece down with a TSP substitute and scouring pads (the TSP substitute does not need to be rinsed off like actual TSP) which helps prep surfaces for paint. Run your hand over it, if you feel any particles, wipe it down again with a dry cloth.
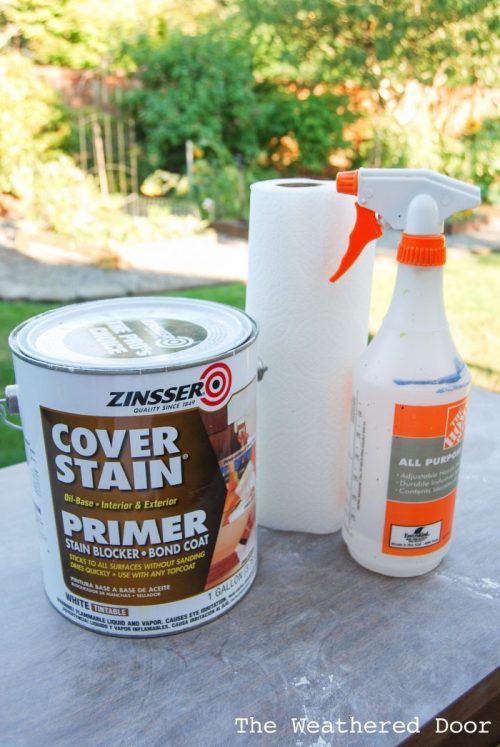
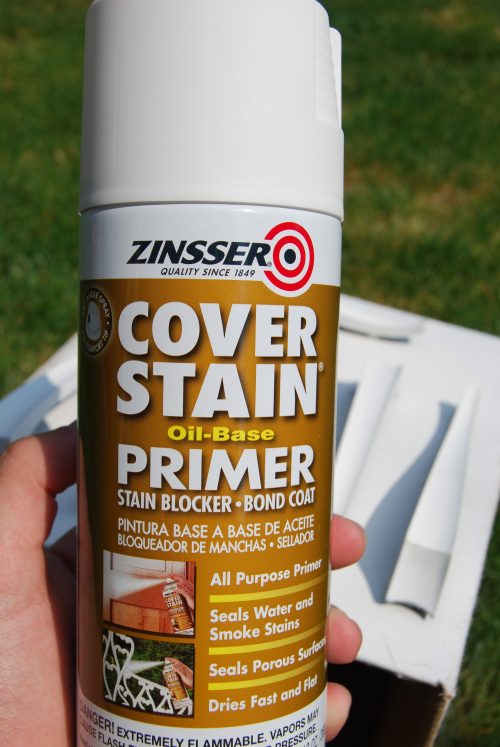
3. Prime with an oil based primer. I like to use a foam brush to apply primer because I don’t have to deal with brush marks, plus they are cheap and I just toss them once I’m done. I use Zinsser Cover Stain. This stuff is great and it acts as a bond coat. I don’t put it on very thick with the foam brush, so I apply 2 thin coats. You can also buy primer in a spray can and spray it on (not as cost effective, but saves you time). ***update: I now only spray on primer. It creates a much smoother finish ***
4. Sand the primer smooth. Once it is dry, sand it with high grit sandpaper (320 or 400) or a fine sanding sponge to smooth out any marks left by the brush. They will show through when you paint, so make sure it’s smooth! Sand, vacuum and wipe it down with a damp cloth to remove all particles.
5. Paint! Now you can go ahead and paint the piece. I usually do about 2-3 coats of paint (that’s an average) for total coverage, especially over white primer. I prefer General Finishes acrylic milk paints. Also, be sure to seal the paint so it’s wipeable and durable. A great water based poly (I love General Finish high performance topcoat) is best for high traffic areas and can handle being wiped down.
** As a side note most primers are tintable, so if you are using a darker or bright color over the primer getting it tinted to a medium grey usually means less coats of paint. That’s a plus! **
This process is almost exact to how I prep each piece of furniture I paint. This video shows my prep process for painting over wood, these are the same steps I used above to paint over the laminate.
___________________________________
So hopefully this makes you rethink the next piece you see with a laminate top. They really can turn out awesome! Have you painted over laminate before?
How Stain without Striping
Thanks so much for the tips! I'm pinning for later! Have a Happy Thanksgiving!
Leslie @ House on the Way
Do I have to strip a hand painted piece before painting. I don’t think it is wood but a composite of some type. It has a lot of paint texture in the picture of flowers. Can I sand and paint with chalk paint and still get a smooth finish?
Great tips, I've never tried this but it's good to know the proper way for "one day" when I want to. Pinning for then, thanks
Thanks so much!
i have successfully painted laminate furniture without any prepping – using homemade chalk paint – one part calcium carbonate to two parts any type paint, using water to thin to proper consistency. Very easy, forgiving, durable and inexpensive.
great idea! but what is the texture of the paint on the completed project? is it gritty? does it have a dull/matte finish?
I get a smooth finish. If you read the steps you’ll see that I sand before and after priming, and then I have a super smooth finish to paint over. Once I paint I seal with a water based poly (usually in a satin or gloss finish, but you can also use a flat finish for less sheen) to add durability to the paint. So the final sheen/finish depends on what you use to seal the paint.
quick 220-300 sand between each coat is very important and don’t be afraid to use a flat clear coat. Will in no way have any sheen.It will look like its not even therefore getting the true colour of the paint. I like gloss but when doing distressed pieces total flat is much more realistic.
I have a lot of laminate furniture that could really use a new paint job! Pinning this for my next project!
This comment has been removed by the author.
Annie Sloan Chalk Paint will cover anything including laminate. I have painted a few things with it; the key is to let the paint sit longer between coats. Once it is waxed and cured, it is as resistant to scratches as a regular painted surface. I gave my pieces a light sanding before I started but there is no need for a primer. I think laminate is a correct term or melamine. Formica was the stuff they used on kitchen counters for decades-it is a brand name and is still available.
I am interested in trying this formula for home made chalk paint, but have a question; does it dry out like when it's made with plaster of Paris? I've tried that formula and after about a day, it's hard as a rock. Thanks.
Why in world is all that necessary? Why couldn't I just clean the dresser and start painting?
You always could but that won't be a durable finish that will last with lots of wear and moving things around. Sanding the laminate gives something for the primer and paint to stick to and a primer meant for laminate will bond to it and give a more durable finish. If you just paint the laminate you can usually just use your fingernail and scrape the paint off. As much as you may find prep work annoying, there's no better way to a good finish. Skipping it is not a good idea.
What are some paints (brands) I can use after applying primer.. You said you would use milk base paint.. what are some options..???
You can use pretty much any paint after primer. Lately I have been spraying lacquer, oil-based paints or using a water-based acrylic paint. I find these are best for furniture.
Laminate is also a correct term 🙂 I'm not the biggest chalk paint fan, and if I ever do use it the right prep is still required for a smooth, long, durable finish. I strongly recommend a poly or water-based topcoat for durability. Wax does not hold up long term and can melt the piece sits in the sun. Everyone has their own preference though, I have used and still use wax sometimes, but the tops of more things see lots of wear (sliding and moving things around) so poly is what I choose to use especially because I sell pieces and I want what will be most durable for customers.
This is awesome! Have you tried this on laminate/formica (whatever we choose to call it) countertops?
So you use a water based poly and paint over oil based primer? I have not painted laminate, but I always use oil based paints with oil based primer and water based paint with water based primer.
I have not, I don't think paint would hold up on something that would be used so often and for so many functions
You can use water based products and oil based products over one another (most of the time) as long as you follow the directions for cure time. I use oil based stains all the time with waterbased topcoats. The only real oil-based products I use are primer and stain.
Thanks for the tutorial. It seems like the same thing I do before I paint anything (at least the way my dad taught me.) I typically tint my primer a lighter shade of the final color of paint. It has made painting everything from rooms to furniture much easier.
You say to use oil primer. I have a ton of water based zinsser and want to know if I will totally screw it if I use that instead of the oil based. I have a dresser that I am turning into a buffet and I need to do it double quick before the in laws visit in about 10 days. I would hate to have to take another trip to the hardware store as I am rushing to get a few other must do's done as well. Thanks ahead of time.
I haven't used water based primer. My main reason is it doesn't stop bleed through which is one of the major reasons I prime. Read the can and see if it can be used on slick surfaces like laminate.
Ms. Reeves, thanks for the informative Tut. I was wondering about your wording in Step 4 “high grit 320-400 sandpaper”. At first, I thought you were using “high grit” to mean “coarse”, and then I realized that you were referring to a high-numbered grit, which would be a very fine grit. Duh ! Probably no one else was confused by this. Is that sandpaper commonly sold in lumber/hd.ware
Stores? I’ve had some in the past and thought it was primarily used on metal and somewhat hard to find.
I purchase sandpaper from Home Depot and Lowes. I have also purchased some off of Amazon. Whatever is easiest and most convenient for me, and cost is also a factor. I buy regular sandpaper, not the ones that are specifically for metal (it would specify on the package if it were, in my experience).
You can just use Annie Sloan paint and wax….no need for sanding or priming!
I want a more quality painted finish and much different look that what chalk paint offers. With laminate, primer is a necessary step for me. I’m not willing to compromise quality since I sell pieces. I want a product that is specifically designed to bond to laminate and also help my paint stick and last. It also helps with any type of bleed through which are things chalk paint can’t do.
Please advise what is TSP
TSP stand for trisodium phosphate which is a cleaning agent. Do note that I only use TSP substitute which does not need to be rinsed off like regular TSP. You can read more about the product and directions on the back of the bottle.
I am preparing to paint a bathroom lamimate countertop with Annie Sloan chalk paint. Have heard it willl stick to anything. Thought I’d try it and apply General Finishes polyacrylic over it to seal. Already tried primer, which did not seem to adhere well, but kept going with three coats and then used stone spray paint over it. Total disaster. Had to wipe/scrape it all off. Would welcome any advice to make it work this time!
Did you really sand and rough up the laminate so the primer had something to hold on to? Also, you have to be sure you are using an oil based primer that is meant to bond to laminate. The surface has to be extremely clean, so wiping it down many times with a damp cloth, tsp substitute wash, and a microfiber cloth should get everything off it. Both primer and paint take days to months to fully cure and the durability happens overtime and with the right products (the primer, paint, and sealer).
So funny. I have this exact same dresser and I have been wanting to paint it for so long. I never thought it was possible, but with this tutorial, I am seeing that it is. Do you have any photos of your finished product? I am also very unsure of what color I’d like to paint it. Thank you!
Hi, I was wondering what type of paint you used over the oil-based primer? Thanks
I used an acrylic paint, specifically it’s General Finishes milk paint (not a true milk paint, it is acrylic)
I had two questions. One similar to Ruth’s, you suggest a primer and topcoat, but what kind of paint should be purchased? My husband couldn’t seem to believe I wanted to use actual paint instead of wood stain. Any musts or must nots?
Also, how many coats of the top coat? And if more than one, is sanding needed in between?
I like to use an acrylic water based paint (General Finishes milk paint is a favorite, and it’s not a true milk paint, it’s acrylic). I usually do 2 coats of topcoat, sometimes 3 if it’s the top of a piece that will see more wear. I do use synthetic steel wool or a very high grit sanding sponge between coats to smooth it out and get any small fuzz or particles that may have landed in the finish while it was drying.
Thank you for the helpful hints, now time to get started with a project.
Amazon sells a primer called Xim.works better than anything I’ve ever used.
i have the dark shiny espresso finished dining set,its not very old,and i know my husband would sqak if i wanted to replace it. how can i refinish it,to make it more like a regular wood finish? i would like it just a little lighter in color.
You will need to strip off the finish that is already on it. From there you can just sand and seal it in its natural color or apply a lighter stain and then seal
This is a very good tutorial! I just brought home an American of Martinsville bedroom suit that was my grandfathers that my daughters are going to be using. It’s not as feminine as I was hoping for so I started brain storming how to paint, colors, etc. After I realized it has a laminate top, I was sad I was not going to paint. Your tutorial is perfect to set my mind at ease! Thanks!
Love the videos! One respectful question, though: why is the loud music necessary? I found it overwhelming. But the info is great.
ditto
Lol, I love it, it so relaxing☺️Just turn it down?
Hello. Can I gel stain my cabinets that have what I’m assuming is laminate of the sides of it?
Is the top coat put on with a paintbrush? If so do you get paint brush marks? Is spray painting a better look?
Hi Lauretta, you can brush or spray on. I now spray all/most of my finishes. It provides a more professional look and you don’t get brush marks.
Hi!
I have what I think are laminated bathroom and kitchen cabinets that look like wood, but they are definetly not wood. Would this painting process be recommended for cabinets?
Hi there. Love your stuff! Quick question about the milk paint. Do you brush or spray the 2-3 coats? I know you spray the finish, the milk paint also? Thanks!
For real milk paint (comes in powder form and you mix it with water) I brush it but with GF milk paint (it is actually acrylic-latex) I prefer to spray but it does brush pretty well.
What is the reason for the oil based primer? Is it mandatory for the laminate surfaces? Please respond, I have an entire set of campaign furniture to paint.
The prep and primer are helping bond to the laminate and then bond the paint to the primer.
Can you do this process on Laminate/formica counters (1989). I was thinking of buying Martha Stewarts Kit, but it is real pricey. Before I sell my home, I need to update baths slightly. If I didn’t have to invest in granite or composite countertops it would save me a ton!!! Thanks!
Hello everyone. I have been painting furniture for 40+ years. In the beginning, I would sand down the wood or laminate, clean, paint my designs with water-based acrylics and finish the piece with Polyshield waterbased finish. On most of the pieces, using water-based paint and finish worked great. However, on some pieces, the clear top coat would “fish eye” and leave gaping holes in the finish. It didn’t affect the paint, just the finish. After much searching, I discovered that the cause of the problem was oil. If the previous owner had used an oil based furniture polish or primer, the oil would penetrate deeply into the wood. The acrylic paint was not enough to seal the oil inside, so it would eventually rise to the top and keep the finish from being a smooth coat. So I don’t recommend using anything oil based for a primer unless you plan to also use oil based paints and finishes like polyurethane. Also bear in mind that polyurethane will yellow over time. I’m happy for those of you who have had good results with water over oil. I just wanted to give a word of caution based on my many years of experience.
Hi guys just needing some help I have a bathroom vanity I would love to paint it is white with a really smooth shiny finish and not shore what to paint it with I have no idea what it is made of , and it is quite old and ugly lol would love your help Thankyou
I have a laminate dinning room table with multiple leaves. The edging around it is laminate but it is knicked and chipped. What do i do with that? This table was my parents and is 60 years old. Would love it to look different since i have used it for many years!!,
Excellent instructions for a ‘newbie” to all of this!! I have his little end table that is incredibly useful but it’s all scuffed up from years of use. I sometimes wonder if it’s worth all the supplies/paint/stain/sanding paper etc., one has to buy, but it would be an incredible feeling to have done it myself. Who knows, maybe the table will wind up better than ever – at least your article got me to thinking that may be the case. Thanks again!
It should be noted, laminate and veneer are NOT the same thing. Laminate is simply a printed piece of special paper adhered to manufactured wood, like MDF or plywood. Veneer is actually a very thin piece of real wood adhered to a cheaper wood, manufactured wood, MDF etc.
Laminate CANNOT be stained. It MUST only be painted, and it requires priming first (yes, can use oil-based primer, then latex paint over that, just make sure each process is allowed to thoroughly dry between applications). When using paint, you can use lighter or darker paint colors and a wood-grain tool to give the effect of wood, and the various colors of wood (i.e., driftwood, barnwood, weathered grey, etc). Last step after last coat of paint should be polyurethane or polycrylic (both are fine for tables that do NOT get a ton of high traffic, examples being dressers, end tables, accent tables etc.), with at least 2 coats, allowed to dry between applications.
Veneer CAN be stained, as long as you do not sand THROUGH the veneer to the underlying manufactured wood underneath. Sanding takes special care in this case because of the veneer’s thinness. If you do sand through, you can either patch it with wood filler and sand again, but stain will not adhere well to the patched area. If the veneer is really damaged, has chips, long gouges, air bubbles, anything that is difficult to repair etc, it is nearly ruined anyway, so best bet is to take it off (labor-intensive) and use a paint method only (remember, you can still get the wood-look with different colors of paint and even glaze, the right brushes or wood-grain tools).
Veneer can be both stained and painted – it doesn’t require priming because your first coat is going to be stain. For a whitewash effect, beachy, light weathered look etc., you can apply a watered down version of latex over the stain (once the stain is dry), and you can apply several coats of different colors to achieve your desired effect – SO LONG AS, each application is allowed to dry thoroughly between applications – this could extend your dry times to a few days to several days. Another effect is the “dry-brush”, only applying very light and thin strokes of light paint on a dry brush to give an aged, whitewash, or streaky appearance – drying time would be fast in this case.
If you only stain veneer, you can top coat it with nearly anything you want, just read the directions, and research your options, because you want durability, but you don’t want yellowing on a white or light-colored paint.
Thought I’d ad a few of these tips, because while some bloggers try to answer questions, sometimes, a great many details are left out (time restraints etc). I would recommend to newbies to browse a lot of tutorials, compare the differences between methods, practice on wood pieces before you dive into a cherished piece.
Can this process be done on apartment cabinets without removing them?
You use a oil based primer and water base paint and sealer? I didn’t realize you could go over oil base with water base?
Hello! Just found this pin on Pinterest. Now that it’s been some time since you started this painting process, is there anything you can tell me about the durability of this in the long term? Thank you.
Please help! I have over- sanded a small laminate cabinet in some areas, especially on the edges of a grid overlay. How do I fix this? I plan on painting the cabinet with possible distressing. It’s just the most charming piece and I hope I haven’t ruined it. Thanks.
Thanks for sharing, it looks great!
Will this method work on laminated kitchen cupboards? Another lady asked this question and there was no reply so I will ask again. Thanks
I would think so although I have never personally done it on cabinets. Since cabinets receive so much use and wear I would be weary about how it would hold up. Let us know if you try it!
Do you sand after painting the whole piece or just after priming?
Between coats I sometimes do to remove imperfections but not after the final coat
so in order to spray the GF , do you use a spray gun or do colors now come in a can?
if spray gun, what type do your use?
You can brush, roll or spray their products. I brushed them all the time and still do.
oh, also, where is a photo of the finished product? would love to see a (or some ) samples. I have a mid century long low with a laminate top and am terrified of ruininng it…but would love to change the laminate top.