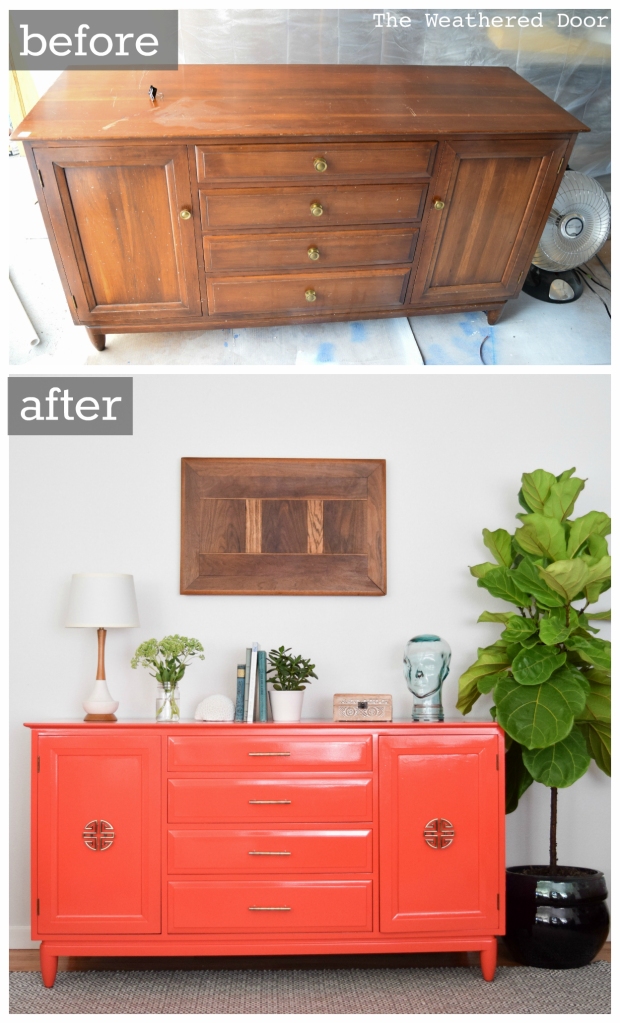
Oh man was this baby a headache! Plus it took about 2.5 months of work. Not exactly constant, but at least a couple times a week of prepping, filling, sanding, priming, sanding, spraying, spraying and more spraying. But it’s done! And while I’m happy with it, I am ready to move on to some other projects.
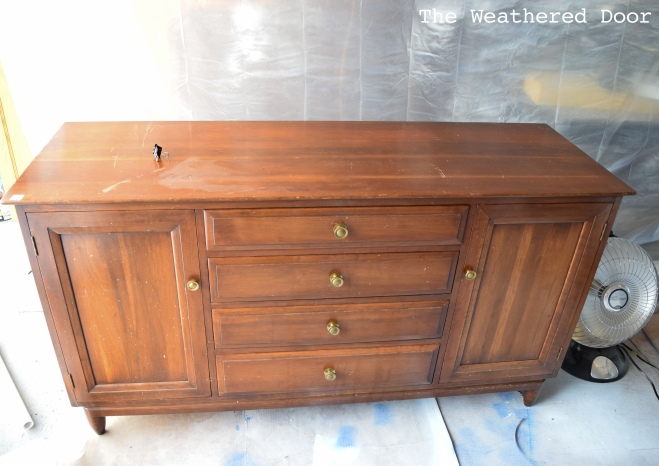
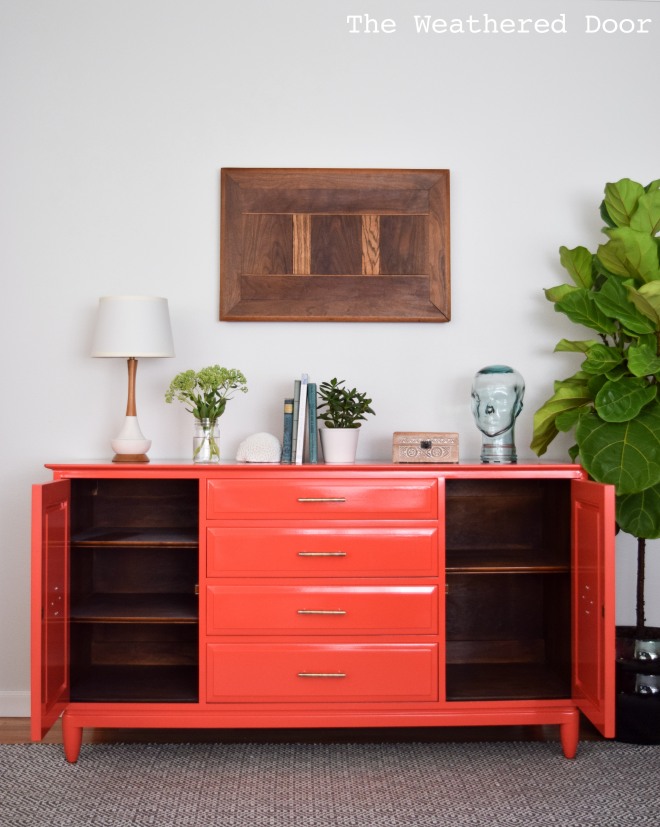
I stumbled upon a Willett buffet piece at Goodwill one day and snatched it up right away. I didn’t even have to think about it, I just knew it would be a good piece. It is made from solid cherry and is part of Willett’s transitional line of furniture. I liked the clean lines and the little hints of mid-century style it has while still being a traditional piece.
To start with I had to fill what seemed like hundreds of tiny dings and some larger scratches on the top and sides. I filled each one twice and sanded in between fills. I also knew I wanted to change the look and style of the piece by switching out the plain knobs it originally came with so I also filled the original boring holes at the same time. After a good sand everywhere I cleaned off the piece and rolled/brushed on (with a foam poly brush) 2 coats of Zinsser Cover Stain. I used my can that had been tinted a medium grey since I knew a red-orange color would be going on the piece… and that family of colors always require many coats.
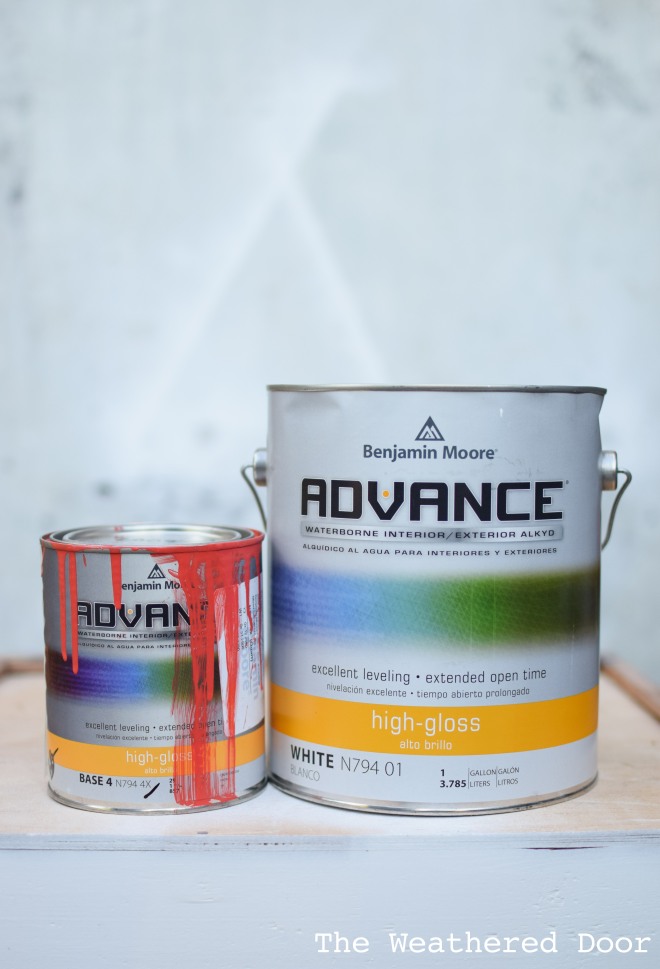
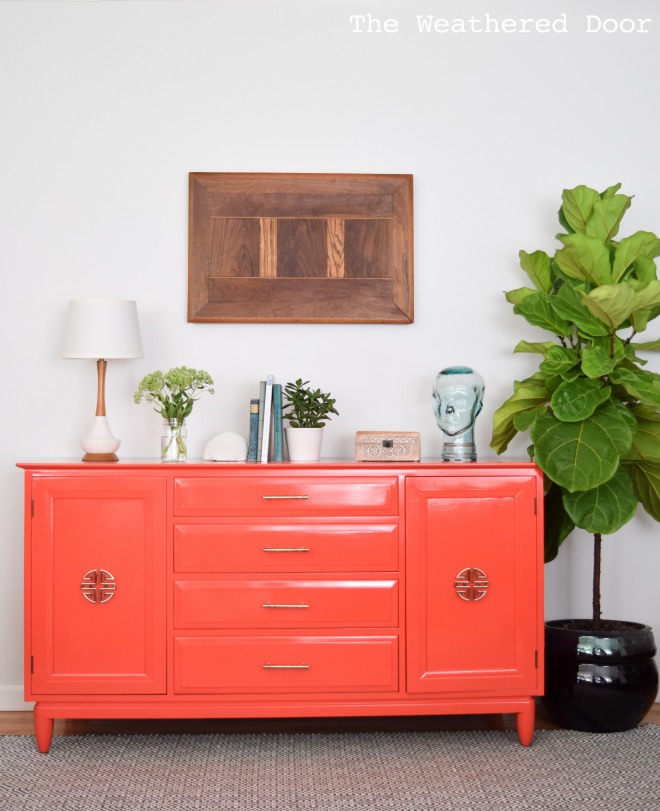
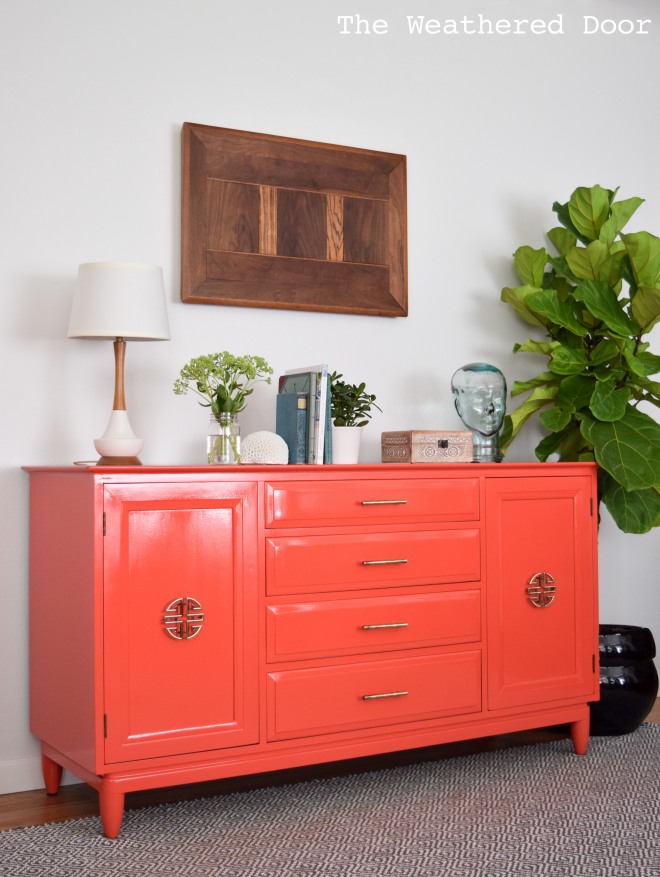
When choosing a color I went with Benjamin Moore “Salsa”, which is a red-orange color. I’ve always been drawn to the color and for the past 3 years I pull the swatch every time I’m in a BM store. I have about 10 swatches of this color around and thought it was finally time to try it out. I used BM Advance in high gloss for the piece and after 2 coats I realized just how coral it actually looked. I was definitely expecting a red-orange. I went with it though, and in the end I had sprayed on 5 coats of paint. I sanded with a high grit sanding sponge or synthetic steel wool in between each coat of paint to smooth everything out. I did get a few drips/sags in the paint once. These occurred around the beveled moldings where the paint would pool up more. Once it happened I was able to spray those areas differently and not have it happen again.
If you want more details on how to use BM Advance paint and some of the pro and cons of it I recently wrote a detailed post giving my own little review about my experience with the paint. And I threw in a bunch of tips I’ve learned while using this paint. To see the post click here.
After letting the piece cure for a few weeks I brought it inside and added the new hardware I purchased off of Etsy. I chose brass bamboo pulls for the drawers and chinese style pulls for the doors. I used 2 pulls for each door to make a complete circle, and measuring and drilling holes for those took me hours. There was no room for mistakes with these. I love how the new hardware has totally transformed the piece and it hardly looks the same as it did when I first brought it home!





Gorgeous and perfect as always! I've done a few of these higher gloss MCM pieces and have found that no matter how diligent I am about filling in dents and dings, there is always one or two that I miss and they appear after I start with the priming or especially during the painting phase! Arggg…..
And for drilling new holes…you drill them after you paint? Is there a benefit to waiting to drill after painting? I drill before any paint because it seems like there is always a little splintering after drilling that needs a good sanding, I'd be a nervous wreck after working so hard to get such a perfect finish and then lugging out the drill! I'd never make a good surgeon! 🙂
Oh WoW! You did a lovely job on this piece! It looks professional! I would like to invite you to share your work on my linky party. It starts Thursdays at 6:00 pm (MST). It is a Furniture only party and I would be honored to have you join! I hope to see you there!
Smiles!
Terry
http://thecuratorscollection.wordpress.com
You always take great care with every piece. Love the color. Absolutely stunning!
Stunning! I love how you select hardware!
Oh yes, I know what you mean with the filling! You don't want to miss a spot when using a gloss finish!
I didn't drill new holes before I began painting because the hardware was not supposed to arrive for about 2 weeks, and I wasn't willing to wait. I just used painters tape on both sides of the spot where I was drilling holes and made sure to not try to use too much pressure and drill too fast since that is what i have found will cause the splintering. Using a block of wood to drill into also helps 🙂
Thank you! 🙂
Thanks, I appreciate that! I was skeptical about it and second guessing it right before drilling holes to attach the new hardware, but I really think it's more fun and interesting than the original knobs that came on the piece.
Great piece! Having worked with the Advance paint, I can appreciate the time and effort this piece took! Especially with all of that prep work! Holy smokes! Well done! Love the color too..
What an awesome piece! Love your color and hardware choices – this is a great statement piece. You really have an incredible design sense. And I have to tell you – Goodwill is my fav – they have great finds (not to mention it feels good to support their job program by shopping there).
Wow! Amazing that you could envision it as an asian piece!
Holy Crow Reeves!!!!!! This is so freaking amazing! You are right about it looking nothing like the original piece! This is just WOW!
Great work, im doing a similar dresser having difficulties spraying advance. at what psi do you put your compressor your gun and the tip you are using??? do you thin advance ??? continue your great work thanks
I set the pressure around 40 psi, but higher may be better. I do thin the advance, if I don’t my gun will not spray it. I normally use the 2.0 tip (I think that is one of the sizes that came with my gun), I can’t remember if I have used my 1.4 tip or not. I normally use the smaller one for poly.
Did you use a wood filler to fill it?
You did such an amazing job!
I’m looking to use Advance on kitchen cabinets. The satin one. Any recommendations? Debating spraying or brushing it on. If I spray how do I thin it?
Thanks!!